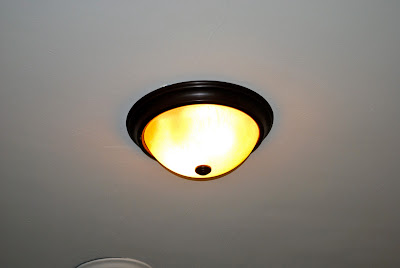
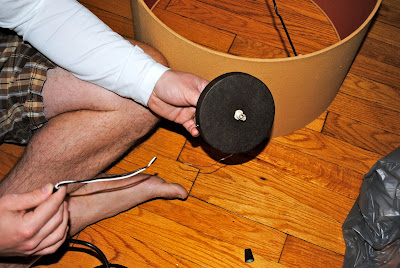
I was pondering and browsing pinterest for ideas when I remembered this lonely lamp shade we had stored in our basement. We did have an awesome set of matching lamps, but about 3 moves ago one of the ceramic bases bit the dust. This lonely lamp shade made three moves with us without any base. This is a feat in and of itself because the hubby and I aren't pack rats in any way, shape, or form, well mostly not, so for us to move this lamp shade with us only to put it in storage 3 times just goes to show you it is special. I proposed the idea of using it for our "new light fixture, but the hubby wasn't totally sold until I held it up toward the ceiling at which point he started to feel what I was feeling. We did have to buy a pendant light fixture from Lowes to hang the shade on, but that was a lot less expensive than buying an entire light fixture. This project was actually very simple, and I have to admit that the hubby did almost all the work. I guess this post should be a project dude post rather than a project chick post. Oh well! First step was to figure out exactly how we were going to hang the lamp shade on the pendant fixture. When we got the fixture out and figured out how it was put together it was actually VERY easy to attach the lamp shade . We simply unscrewed the wire cover which you attach the fixture to the ceiling with, and pulled the cord through the lamp shade.
To help secure the lampshade better we also unscrewed a little cone above where you put the light bulb, threaded the wire through, and then screwed the little cone back on. Now that you are confused here is a picture to help show what I'm talking about.
Once we got that figured out, it was time to remove the old light. First step, turn the light off. I also wanted to flip the breaker off to that room, but the hubby was being all macho and only semi-careful so he insisted that was not necessary. He was right it wasn't necessary, we are both here to tell the story.
The removal seemed pretty easy the hubby did it but he explained it to me so I feel like I could do it by myself now. I probably could have done it here with a tad bit of research, but it was nice to have his help because it got finished much quicker. Once that was finished the last step was to attach the "new" light fixture. This was pretty simple too. Attach the red wire to the black wire, and the white wire to the brown wire. This step was just repeating what the hubby had just un-done, and this is just me repeating what he told me he was doing. Once the wires were connected, the hubby unscrewed the old fixture brace, screwed in the new fixture brace, and attached the base to the brace. These terms are all from my own brain, so I what I'm calling a brace and a base could have a different name, but it makes sense to me. Here are a couple pictures to help.
Now for the best part, the after pictures!
We happen to like it a lot! I especially like how the color isn't too matchy matchy. The one downfall is that with the particular pendant fixture we found at Lowes the actual light bulb is pretty small so it doesn't put off a lot of light. We are totally O.K. with this because I'm hoping to make some kind of side table for my rocking chair and we would like to put a lamp on there anyway which will help light up the room a little more. What do you think? Good improvement or what?


No comments:
Post a Comment